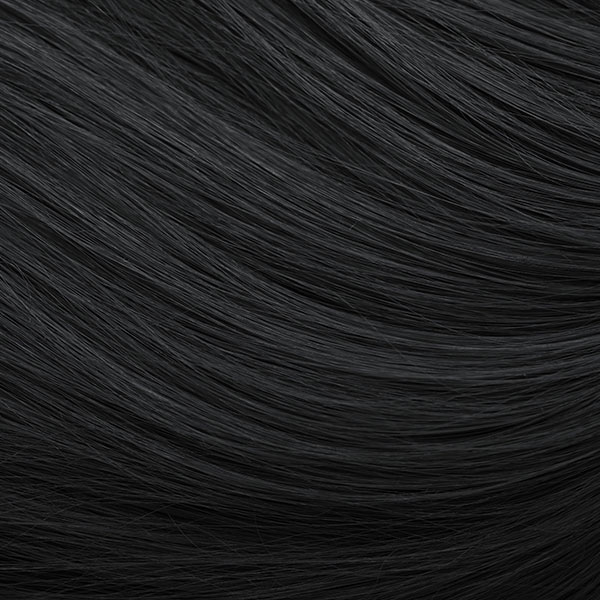
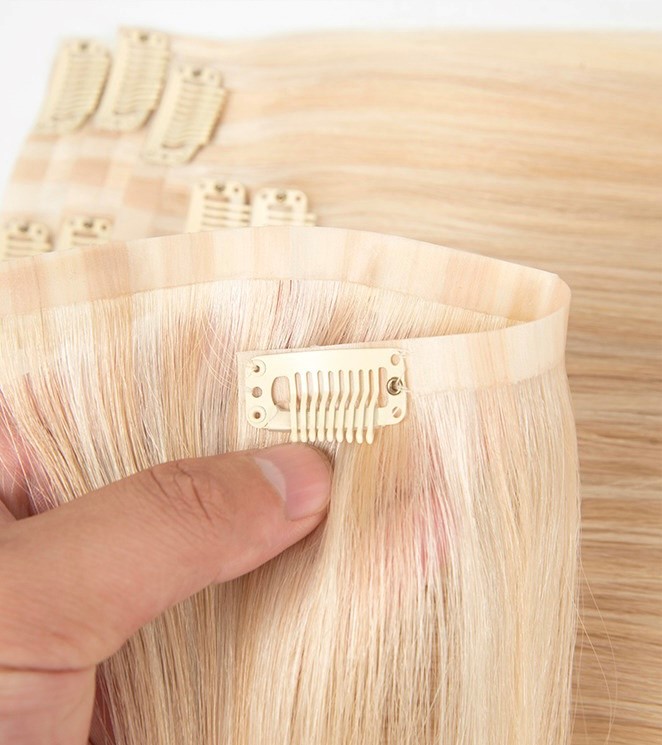
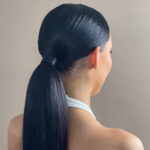
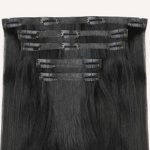
PU Invisible Clip In Set – 6 piece
$550.00 – $620.00
6 Piece Pack:
Weight: 180 grams
Style: Straight Seamless Clip-in
Contains: 2 x 4 pieces 2 x 3 pieces, 2 x 2 pieces
Double Drawn, Cuticle Aligned
Grade: Virgin Human Hair, One Donor
 Same Day Shipping before 12pm
 30-day Money Back Guarantee on hair quality
 Free Shipping Over $250
 Long Lasting over 2 years
  Ethically Sourced Hair
 High Quality & Super Soft
 Buy Now, Pay Later
 Same Day Dispatch
- Product Information
Something about her Luxury virgin hair invisible seamless clip-in hair extensions , the THICKESS and HIGHEST QUALITY on the market.
Offering a high-end and natural solution for adding length, volume, and versatility to your hairstyle.
These extensions are meticulously crafted from premium-quality, unprocessed virgin human hair, ensuring that the hair maintains its natural texture, shine, and healthiness. The term "invisible seamless" refers to the innovative design and construction of the extensions, which are designed to blend seamlessly with your own hair and provide a virtually undetectable appearance.
Our Luxury Clip ins will last over 2 years following our hair maintenance routine listed on this website. The reason why you get longer life from the clip-in range is most people don’t wear clip-ins everyday like the other hair extension methods.
- Always And Nevers
Protecting your clip-in hair extensions is crucial to ensure their longevity and maintain their natural appearance. Here's a list of things you should avoid doing to keep your clip-in extensions in the best possible condition:
Always -
- Proper installation is essential for achieving the desired look and ensuring the health of your natural hair, see our online tutorial.
- Don’t Use excessive heat on your extensions, such as high-temperature styling tools (flat irons, curling irons) , this can damage the hair leading to breakage and a shorter lifespan.
- Don’t Forget to wash , just like your natural hair, clip-in extensions require proper cleaning and care. Neglecting this can lead to dirt build up and reduced lifespan.
- Use our recommended hair care products specifically designed for use with hair extensions. Avoid products containing sulfates or alcohol, as they can damage both the extensions and your natural hair.
Dont -
- Don’t Tug or pull on the extensions when brushing, styling, or detangling.
- Don’t Sleep with wet or damp hair extensions, its more prone to tangling
- Don't swim in saltwater or chlorinated pools without protecting your extensions, you can apply our Heat Protection spray with Argan Oil and tie hair up , this will avoid tangling, fading, and dryness.
- Don't overload your extensions with styling products, excessive product build up can weigh down the extensions and make them look dull or greasy.
- Place the extensions inside a breathable storage bag, this will prevent moisture build up and keep the extensions fresh.
- How Do You Apply?
How do you apply clip in extensions?
Here's a guide to using hair clip-in extensions:
Step 1: Prepare Your Natural Hair
- Start with clean, dry, and styled natural hair. If desired, you can add some texture or waves to your hair before beginning.
Step 2: Gather the Necessary Tools
- Ensure you have the following tools on hand: a tail comb or rat-tail comb for sectioning, hair clips or hair ties to hold sections in place, and a mirror to assist with placement.
Step 3: Section Your Hair
- Use the tail comb to create a horizontal parting from ear to ear, separating the top section of your hair from the bottom. Secure the top section with a hair clip or tie.
Step 4: Prepare the Extensions
- Take out your hair extensions and lay them out in order of size, from widest to narrowest, so they are easily accessible.
Step 5: Start with the Lower Section
- Starting at the nape of your neck, create a thin horizontal parting and clip the rest of your hair out of the way.
- Tease the hair when you will place the clipins, this enables them to stay in place without movement . Take the widest clip-in extension and open the clips. Slide the extension's clips onto your natural hair, close the clips securely, and gently tug to ensure they are firmly attached.
Step 6: Work Your Way Up
- Release a new thin horizontal section of hair above the first extension, slightly overlapping it. Repeat the process of attaching the clip-in extensions, working your way up to the top section of your hair.
- Use longer strips as you move higher up the head, matching them with the width of each section.
Step 7: Blend and Style
- Once all the extensions are securely in place, release the top section of your natural hair and gently blend it with the extensions. Use a comb or your fingers to blend and style the hair for a seamless look.
Step 8: Final Touches
- Check the placement of each extension in the mirror and make any necessary adjustments to ensure they are evenly distributed and concealed.
- Style your hair as desired, using styling tools on low heat whether it's curling, straightening, or adding volume.
Step 9: Removal
- To remove the clip-in extensions, simply open the clips and gently slide them out of your hair, starting from the bottom and working your way up.
With practice, you'll become more proficient in attaching and styling your clip-in extensions, creating beautiful, voluminous hairstyles effortlessly.
- Shipping And Returns
Something about her Luxury virgin hair invisible seamless clip-in hair extensions , the THICKESS and HIGHEST QUALITY on the market.
Offering a high-end and natural solution for adding length, volume, and versatility to your hairstyle.
These extensions are meticulously crafted from premium-quality, unprocessed virgin human hair, ensuring that the hair maintains its natural texture, shine, and healthiness. The term "invisible seamless" refers to the innovative design and construction of the extensions, which are designed to blend seamlessly with your own hair and provide a virtually undetectable appearance.
Our Luxury Clip ins will last over 2 years following our hair maintenance routine listed on this website. The reason why you get longer life from the clip-in range is most people don’t wear clip-ins everyday like the other hair extension methods.
Protecting your clip-in hair extensions is crucial to ensure their longevity and maintain their natural appearance. Here's a list of things you should avoid doing to keep your clip-in extensions in the best possible condition:
Always -
- Proper installation is essential for achieving the desired look and ensuring the health of your natural hair, see our online tutorial.
- Don’t Use excessive heat on your extensions, such as high-temperature styling tools (flat irons, curling irons) , this can damage the hair leading to breakage and a shorter lifespan.
- Don’t Forget to wash , just like your natural hair, clip-in extensions require proper cleaning and care. Neglecting this can lead to dirt build up and reduced lifespan.
- Use our recommended hair care products specifically designed for use with hair extensions. Avoid products containing sulfates or alcohol, as they can damage both the extensions and your natural hair.
Dont -
- Don’t Tug or pull on the extensions when brushing, styling, or detangling.
- Don’t Sleep with wet or damp hair extensions, its more prone to tangling
- Don't swim in saltwater or chlorinated pools without protecting your extensions, you can apply our Heat Protection spray with Argan Oil and tie hair up , this will avoid tangling, fading, and dryness.
- Don't overload your extensions with styling products, excessive product build up can weigh down the extensions and make them look dull or greasy.
- Place the extensions inside a breathable storage bag, this will prevent moisture build up and keep the extensions fresh.
How do you apply clip in extensions?
Here's a guide to using hair clip-in extensions:
Step 1: Prepare Your Natural Hair
- Start with clean, dry, and styled natural hair. If desired, you can add some texture or waves to your hair before beginning.
Step 2: Gather the Necessary Tools
- Ensure you have the following tools on hand: a tail comb or rat-tail comb for sectioning, hair clips or hair ties to hold sections in place, and a mirror to assist with placement.
Step 3: Section Your Hair
- Use the tail comb to create a horizontal parting from ear to ear, separating the top section of your hair from the bottom. Secure the top section with a hair clip or tie.
Step 4: Prepare the Extensions
- Take out your hair extensions and lay them out in order of size, from widest to narrowest, so they are easily accessible.
Step 5: Start with the Lower Section
- Starting at the nape of your neck, create a thin horizontal parting and clip the rest of your hair out of the way.
- Tease the hair when you will place the clipins, this enables them to stay in place without movement . Take the widest clip-in extension and open the clips. Slide the extension's clips onto your natural hair, close the clips securely, and gently tug to ensure they are firmly attached.
Step 6: Work Your Way Up
- Release a new thin horizontal section of hair above the first extension, slightly overlapping it. Repeat the process of attaching the clip-in extensions, working your way up to the top section of your hair.
- Use longer strips as you move higher up the head, matching them with the width of each section.
Step 7: Blend and Style
- Once all the extensions are securely in place, release the top section of your natural hair and gently blend it with the extensions. Use a comb or your fingers to blend and style the hair for a seamless look.
Step 8: Final Touches
- Check the placement of each extension in the mirror and make any necessary adjustments to ensure they are evenly distributed and concealed.
- Style your hair as desired, using styling tools on low heat whether it's curling, straightening, or adding volume.
Step 9: Removal
- To remove the clip-in extensions, simply open the clips and gently slide them out of your hair, starting from the bottom and working your way up.
With practice, you'll become more proficient in attaching and styling your clip-in extensions, creating beautiful, voluminous hairstyles effortlessly.


