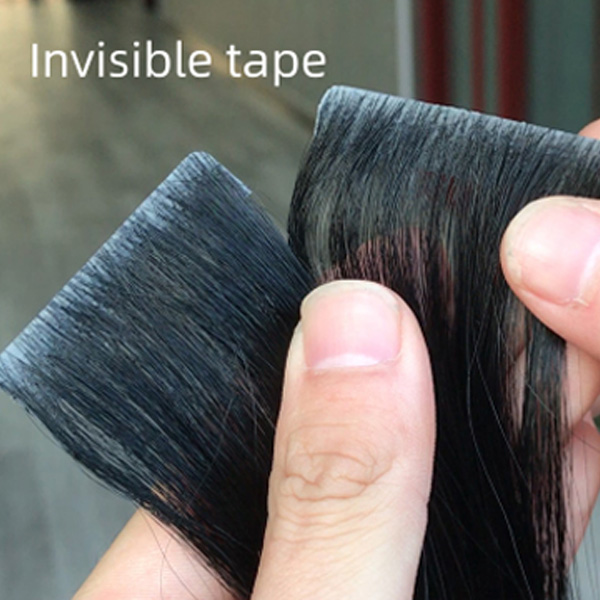
Invisi- Tapes Individual
$100.00 – $130.00
Width: 4-cm wide
Weight: 25g or 2.5g per piece – 10 pieces per bundle
Style: Straight Skin Invisible Tapes – A++ tape used
Grade: 12a Luxury Virgin Human Hair, One Donor, Double Drawn
- Thin Hair: If you have thin hair and are primarily looking to add volume and some length, you might need around 40 individual pieces.
- Medium Hair: For medium hair thickness, you might require 50 pieces for a full head to achieve a balance of volume and length.
- Thick Hair: If you have thick hair and are looking for a significant volume boost and longer length, you may need 60 or more individual pieces.
 Same Day Shipping before 12pm
 30-day Money Back Guarantee on hair quality
 Free Shipping Over $250
 Long Lasting up to 12 months
 Ethically Sourced Hair
 High Quality & Super Soft
 Buy Now, Pay Later
 Same Day Dispatch
- Product Information
Invisi-tape in skin weft hair extensions are the latest innovation in hair extension technology.
The "invisible" aspect of these extensions means that they remain virtually undetectable, even when your hair is parted.
Great for people with thin hair as they are seamless allowing an appearance of normal hair .
These extensions are meticulously crafted from premium-quality, virgin human hair, ensuring that the hair maintains its natural texture, shine, and healthiness.
Our Hair lasts over 12 months following our hair maintenance routine listed on this website.
- Always And Nevers
Always And Nevers.
- How Do You Apply?
Materials Needed:
- Individual Tapes
- Tail comb or rat-tail comb
- Sectioning clips
- Hairbrush or wide-tooth comb
- Mirror
- Prepare Your Hair:
- Wash and thoroughly dry your hair before the installation process. Avoid using heavy conditioners or styling products that may affect the adhesion of the tapes.
- Section Your Hair:
- Section your hair horizontally, starting from the nape of your neck. Use hair clips to keep the sections separated.
Installation Steps:
- Select a Thin Section:
- Take a thin section of your natural hair, equivalent to the width of the tape-in extension.
- Remove the Backing:
- Peel off the backing of one of the tape-in extensions to reveal the adhesive side.
- Sandwich Your Hair:
- Place the tape-in extension underneath the thin section of your natural hair, positioning it close to the roots. Press the adhesive side against your hair.
- Secure the Extension:
- Take another tape-in extension with its backing removed and place it on top of the first extension, effectively sandwiching your natural hair between them. Press down firmly to ensure a secure bond.
- Repeat the Process:
- Continue the process, moving upwards, section by section. Make sure each extension is evenly spaced and aligned with the previous ones.
- Check for Comfort:
- Ensure that the extensions are not too close to the scalp to allow for natural movement and comfort. Leave a small gap to prevent tension on the roots.
- Style as Desired:
- Once all extensions are in place, you can style your hair as usual. Curl, straighten, or wave the extensions to blend seamlessly with your natural hair.
- Shipping And Returns
Invisi-tape in skin weft hair extensions are the latest innovation in hair extension technology.
The "invisible" aspect of these extensions means that they remain virtually undetectable, even when your hair is parted.
Great for people with thin hair as they are seamless allowing an appearance of normal hair .
These extensions are meticulously crafted from premium-quality, virgin human hair, ensuring that the hair maintains its natural texture, shine, and healthiness.
Our Hair lasts over 12 months following our hair maintenance routine listed on this website.
Always And Nevers.
Materials Needed:
- Individual Tapes
- Tail comb or rat-tail comb
- Sectioning clips
- Hairbrush or wide-tooth comb
- Mirror
- Prepare Your Hair:
- Wash and thoroughly dry your hair before the installation process. Avoid using heavy conditioners or styling products that may affect the adhesion of the tapes.
- Section Your Hair:
- Section your hair horizontally, starting from the nape of your neck. Use hair clips to keep the sections separated.
Installation Steps:
- Select a Thin Section:
- Take a thin section of your natural hair, equivalent to the width of the tape-in extension.
- Remove the Backing:
- Peel off the backing of one of the tape-in extensions to reveal the adhesive side.
- Sandwich Your Hair:
- Place the tape-in extension underneath the thin section of your natural hair, positioning it close to the roots. Press the adhesive side against your hair.
- Secure the Extension:
- Take another tape-in extension with its backing removed and place it on top of the first extension, effectively sandwiching your natural hair between them. Press down firmly to ensure a secure bond.
- Repeat the Process:
- Continue the process, moving upwards, section by section. Make sure each extension is evenly spaced and aligned with the previous ones.
- Check for Comfort:
- Ensure that the extensions are not too close to the scalp to allow for natural movement and comfort. Leave a small gap to prevent tension on the roots.
- Style as Desired:
- Once all extensions are in place, you can style your hair as usual. Curl, straighten, or wave the extensions to blend seamlessly with your natural hair.


